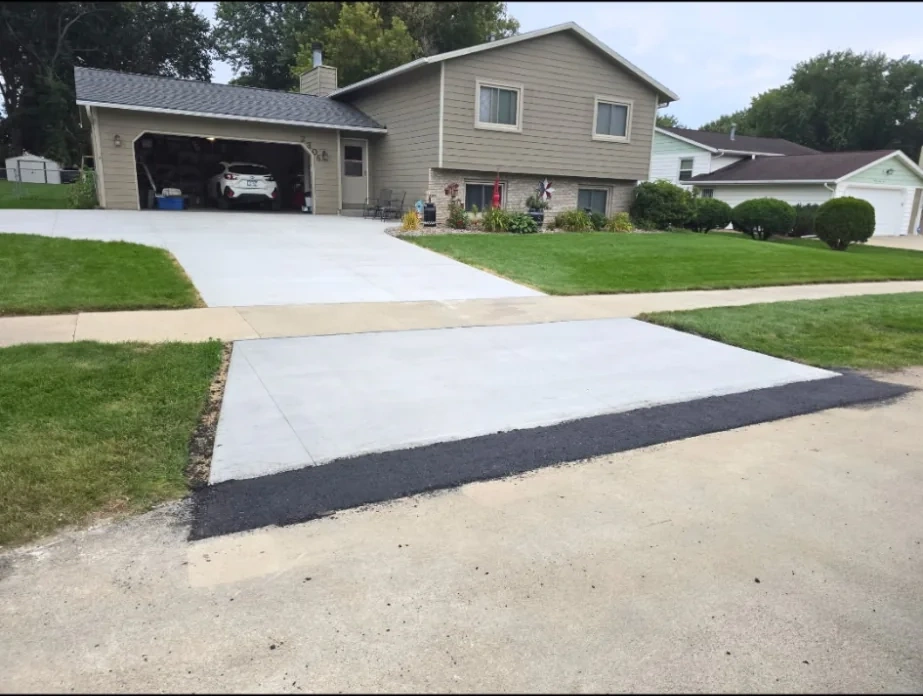
Concrete and asphalt expand and contract at different rates, so the joint where your concrete apron meets the asphalt road or driveway needs a full-depth flexible filler, not a hard butt joint. The filler runs the entire depth of the concrete slab and gets capped with a flexible polyurethane sealant on top. Re-seal that cap every 3 to 5 years. If you do not, water gets in, freezes, and erodes the base under the apron.
Two Materials That Move at Different Rates
Concrete expands and contracts at a thermal coefficient of roughly 5.5 millionths of an inch per inch for every degree Fahrenheit. Asphalt moves more than that, and it moves more easily because it is a flexible material that softens in heat. In a Minnesota year you swing from 20 below in January to 100 degrees on a hot July afternoon. That is a 120-degree range, and the concrete and the asphalt on either side of your transition joint are both reacting to it, at different rates, in different directions, all year long.
Run the numbers on a 20-foot concrete apron. At 5.5 millionths per inch per degree over a 120-degree swing, that slab changes length by about a sixth of an inch across the year. The asphalt next to it moves more. So you have two surfaces meeting at a line, and that line opens and closes by an eighth to a quarter inch every season as the temperature cycles. If you bond those two materials together rigidly, something has to give, and concrete gives by cracking. The whole point of the transition joint is to let the two materials move independently without tearing each other apart.
What Happens When a Contractor Skips the Joint
When a crew pours a concrete apron tight against existing asphalt with no expansion joint between them, the failure is predictable. The two materials lock together along the seam. Come the first hard temperature swing, the differential movement has nowhere to go, so it cracks the concrete. The crack almost always shows up a few inches back from the seam, running roughly parallel to it, because that is where the stress concentrates. Once that crack opens, water gets into it, freezes, and pries it wider every cycle. Within a couple of years you have a spalled, crumbling edge on what should have been a clean apron.
You see this on a lot of older driveways where the apron was poured as an afterthought, or where someone added concrete to an asphalt drive without understanding that the two need a movement joint between them. The tell is a crack that parallels the concrete-asphalt seam and a ragged, broken-down edge along the transition. By then the fix is not a re-seal. It is cutting back the damaged concrete and rebuilding the edge with a proper joint.
The Right Joint Material: Fiber Board vs Closed-Cell Foam
The expansion joint filler has to compress when the materials push together and recover when they pull apart, and it has to fill the full depth of the slab so water cannot run under the concrete. Two materials do this job, and which one we use depends on the application.
Fiber-cellulose expansion board, the asphalt-impregnated fiberboard you have probably seen, is the workhorse for most driveway and apron transitions. It comes in half-inch thickness, runs the full slab depth, and compresses and recovers through normal seasonal movement. It is the right call for a standard residential apron-to-asphalt joint. Closed-cell foam backer material is what we reach for when the joint is wider, when we need a cleaner backing for the sealant cap, or on a job where we want a more consistent compression behavior. The foam does not absorb water the way an old, weathered fiberboard eventually can. Neither one is the surface seal. Both are the structural filler that lives down in the joint, and both get capped on top.
The Polyurethane Cap and Why It Wears Out
On top of the full-depth filler, we lay a bead of flexible self-leveling polyurethane sealant. That cap is the part you can see, and it is the part that actually keeps water out of the joint. Polyurethane stays flexible and stretches with the seasonal movement instead of cracking the way a rigid filler or cheap caulk would. But it is exposed to sun, road salt, tire traffic, and 120 degrees of temperature swing, so it does not last forever. After 3 to 5 years the cap starts to dry out, lose its grip on the joint edges, or split. Once that happens, the seal is broken even if it still looks mostly intact.
How to Inspect Your Existing Transition Joint
Walk out to the seam where your concrete apron meets the asphalt and look at the caulk line. A healthy seal is continuous, still slightly flexible if you press it, and bonded to both edges of the joint. Failure shows up as a few specific things. Look for the sealant pulling away from one edge, leaving a gap you can slide a coin into. Look for cracks running along the length of the bead. Look for the sealant gone brittle, where pressing on it does nothing because it has hardened. And look for any spot where you can see down into the joint, because that means water has a path in. If you find any of those, the cap has failed and water is getting under your apron whether you have noticed it yet or not.
DIY Re-Seal vs Calling a Contractor
If the joint filler underneath is still sound and only the top cap has worn out, a re-seal is a job a capable homeowner can do. You clean the old sealant out of the joint, make sure the filler below is intact and the channel is dry, and lay a fresh bead of self-leveling polyurethane joint sealant from the hardware store. The work is straightforward. The part people get wrong is not cleaning the joint properly, so the new sealant never bonds, or sealing over a joint where the real problem is below the surface.
That is the line where you call a contractor. If the filler below the cap is gone, broken down, or full of debris, a new cap on top of nothing will fail again fast. And if the failure has gone on long enough that water has been getting under the apron, you may have a bigger problem than a caulk line, which is the next section.
When Water Has Already Damaged the Base
Here is why a failed transition joint matters beyond appearance. Once water gets under the apron through a broken seal, it saturates the gravel base, then it freezes. Freezing water expands by nine percent and pushes the base material around. Over enough cycles, the freeze-thaw action washes fines out of the base and erodes it, leaving voids under the concrete. Now the slab is bridging an empty space. It is only a matter of time before a heavy vehicle or another frost cycle cracks the unsupported section and the apron settles.
You can sometimes tell this has happened before you pull anything up. Tap across the apron near the failed joint and listen for a hollow sound that signals a void under the slab. Look for a corner or edge of the apron that has dropped lower than it used to sit. Look for new cracks near the transition that were not there before. If any of those are present, re-sealing the top is putting a band-aid over a base problem. The apron needs to come up, the eroded base needs to be re-compacted and brought back to grade, and the slab needs to be repoured with a proper full-depth joint. We will tell you honestly which one you are dealing with after we look at it. Sometimes it is a 200-dollar re-seal. Sometimes the base is gone and it is a rebuild, and pretending otherwise just means you pay for the seal twice.